
MegaPi - Born to Motion Control
MAK038-P
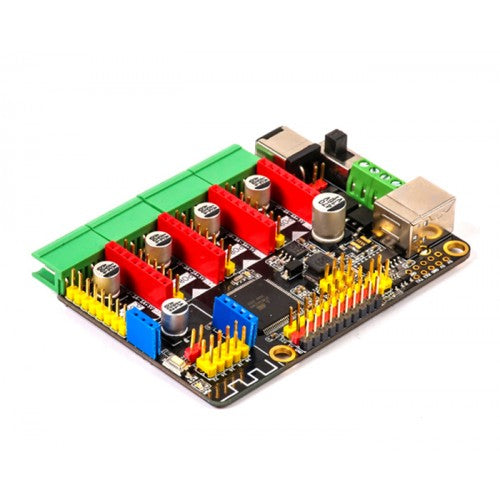
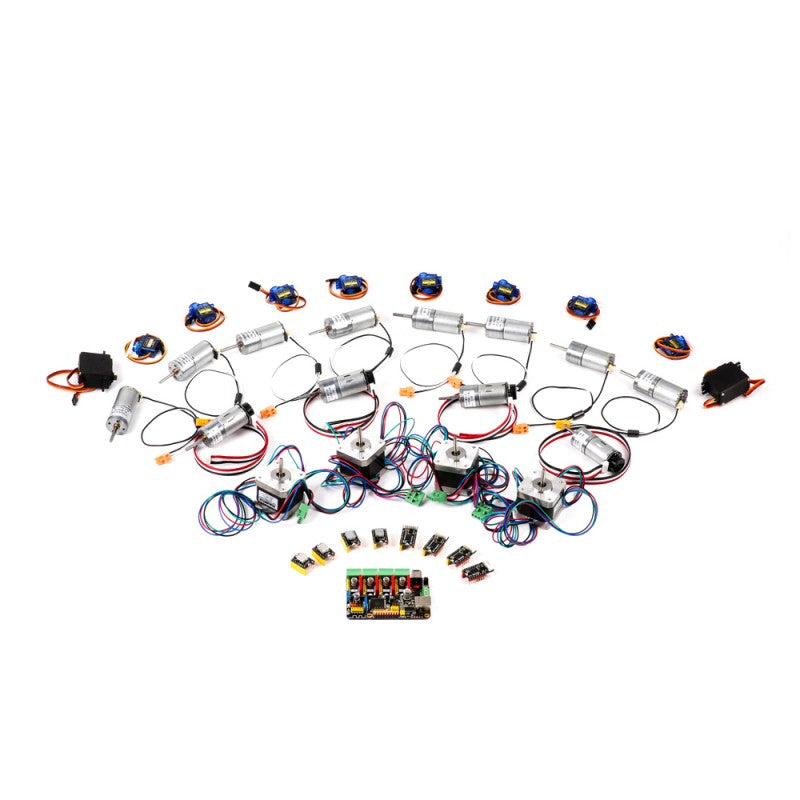
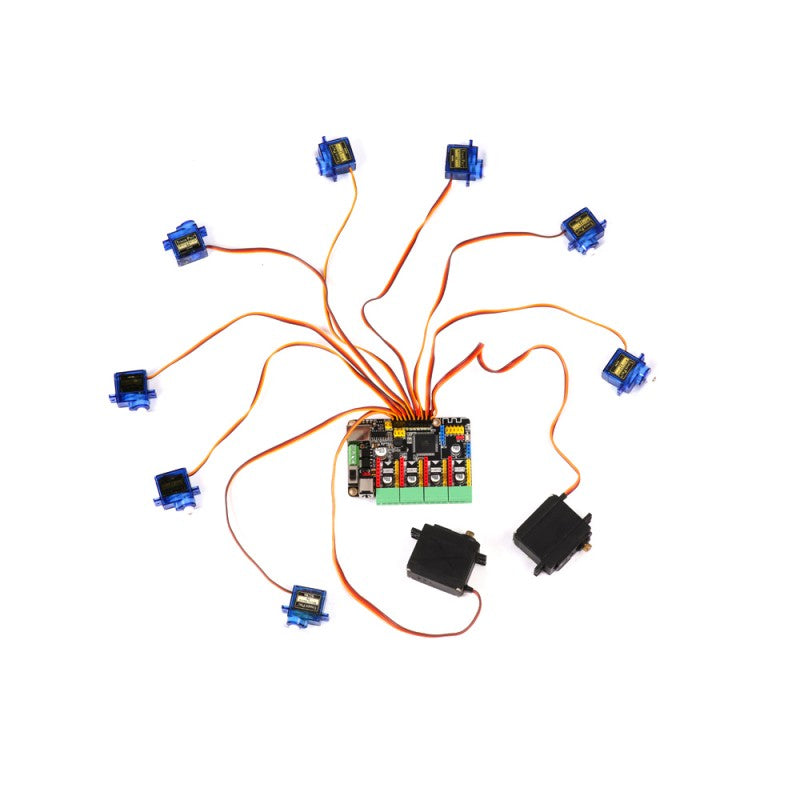
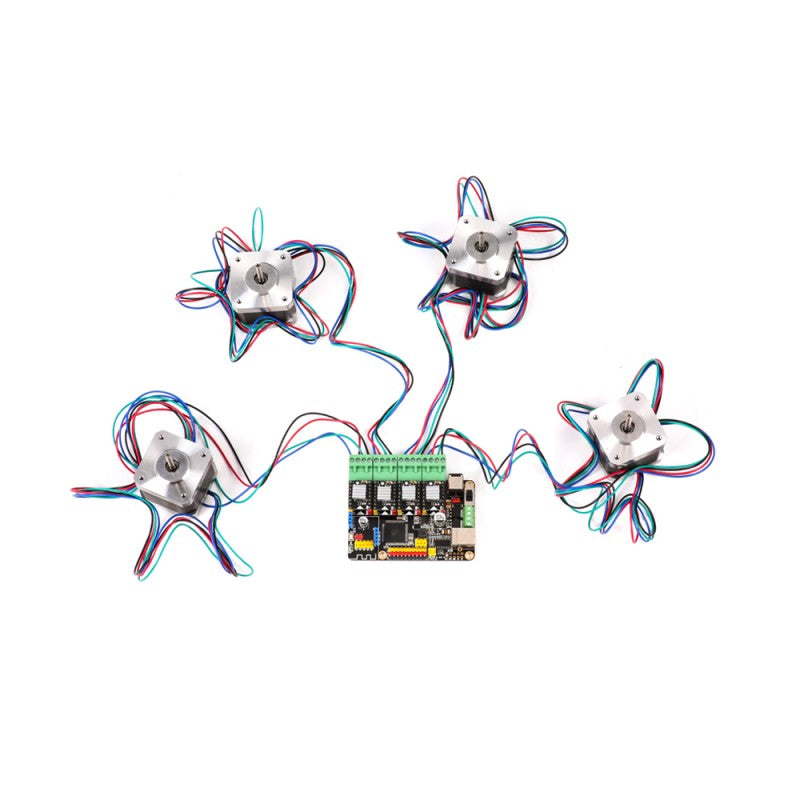
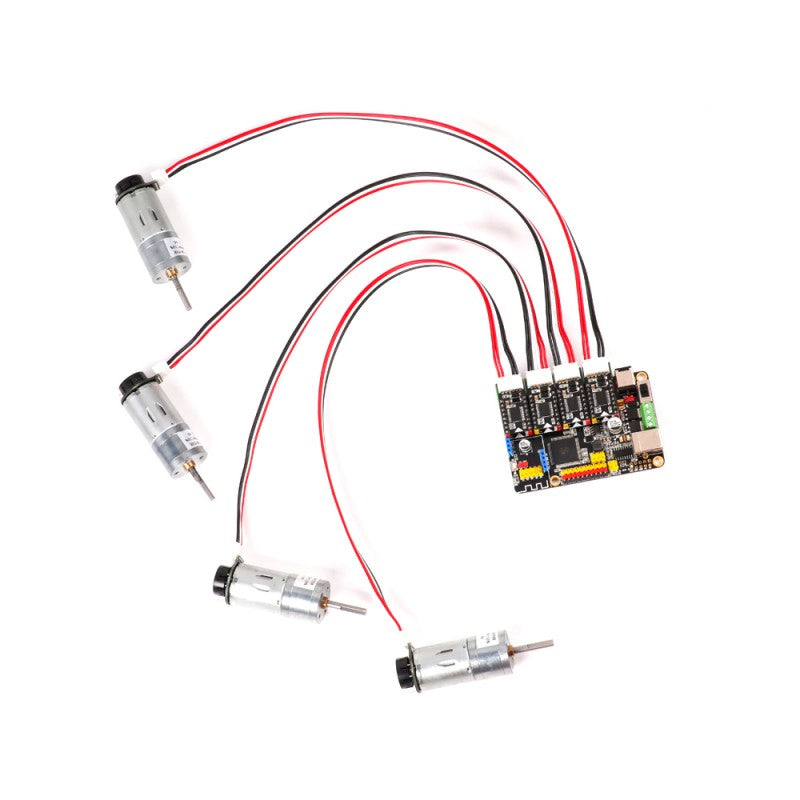
MegaPi is a microcontroller board based on ATmega2560. With abundant motor driver interfaces, it can control and combine different kinds of motors rapidly, drive 10 servos and 8 DC motors/ 4 stepper motors simultaneously and have a maximum output current of 10A.
MegaPi - Born to Motion Control
MegaPi is a microcontroller board based on ATmega2560. With abundant motor driver interfaces, it can control and combine different kinds of motors rapidly, drive 10 servos and 8 DC motors/ 4 stepper motors simultaneously and have a maximum output current of 10A.
MegaPi can be programmed with Arduino software (IDE) or graphical programming language. It is even better that MegaPi works perfectly with Raspberry Pi, by which makers will be able to drive motors and sensors with Python!
With strong motor-driving ability and ease of use, MegaPi is an ideal option for 3D printer, CNC, robotic project etc.
What can I do with MegaPi?
As what is mentioned above, MegaPi is an ideal option for the projects with higher requirements of driving motors, such as robot-making, 3D printer and CNC. It also meet the needs of Raspberry Pi fans. Just take a look at these brilliant projects:
We will continuously renew these projects. Please pay attention!
How to Use MegaPi?
Take it easy! It is quite easy-to-use though with great capabilities. If you are a fan of Arduino or Raspberry Pi, we believe that controlling Mega Pi will be a piece of cake to you, since you must know Arduino IDE or Python programming very well. (Controlling MegaPi through Python programming requires a Raspberry Pi, and you have to weld their communication interfaces together.)
Graphical Programming
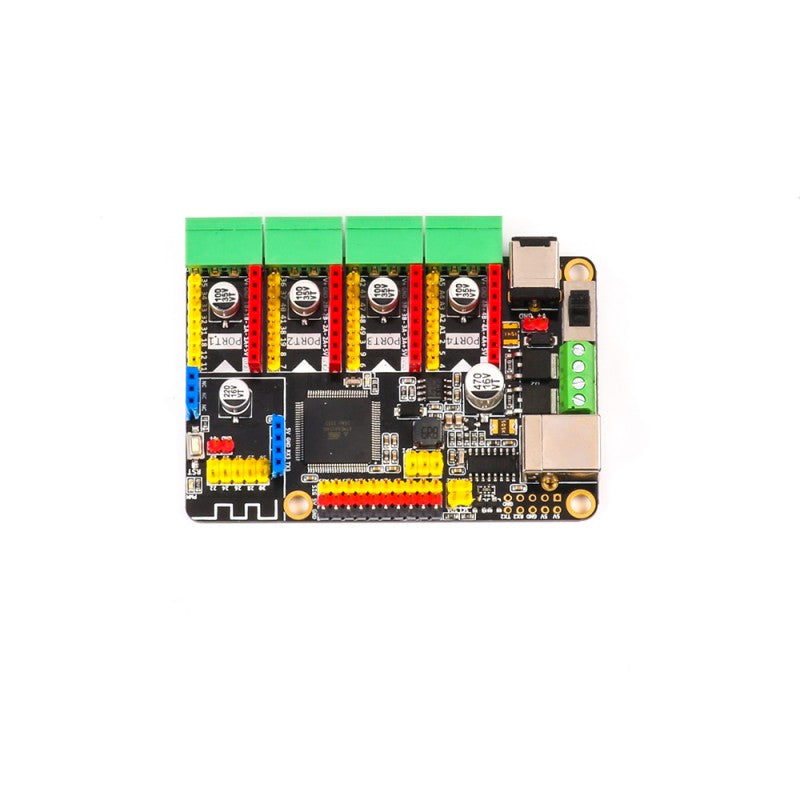
We also prepare graphical programming for the beginner of Maker, making creating robot very easy. We even add the control program of MegaPi into our App, which enables you to control MegaPi with iPad! As congeneric products, MegaPi also need to control motor by motor driver. However, the driver interfaces of MegaPi are encapsulated and anti-reverse, so that you can insert or pull out driver module conveniently.
Driver modules types:
• DC/coding electric motor driver
Thus, don't forget to buy motor driver if you intend to do some projects with motor. We prepare some instructions :
User Guide:
Learn: http://learn.makeblock.com/megaPi/
Arduino IDE: http://learn.makeblock.com/learning-Arduino
Makeblock HD App: http://learn.makeblock.com/makeblock-app-hd/
Whom is MegaPi Born for?
Constructing and developing projects like robots, 3D printer and CNC require main control board with stronger motor-driving ability and diversified program languages for users of different levels. MegaPi is exactly born for this. As the newest generation of microcontroller board of Makeblock, it inheres our idea: making creation easy.
• If you are a geek who need a cost-effective board to make your infinitive creative ideas into practice;
• If you are a teacher or a student of STEM education who desires to learn open-source hardware and program language;
• If you are a cool parent who wants to create something, enjoying DIY with your kids.
MegaPi will be the best choice for you.
Features:
• Four motor driver interfaces for adding encoder motor driver and stepper motor driver, and thus to drive DC motors, encoder motors and stepper motors;
• One wireless communication interface for adding Bluetooth module or 2.4G module;
• Ten servo interfaces which enable the board to drive up to 10 servos at the same time;
• Two high-power MOS driver interface which is able to drive devices with a maximum current of 10A. Maximum current output of DC 5V output port is 3A.;
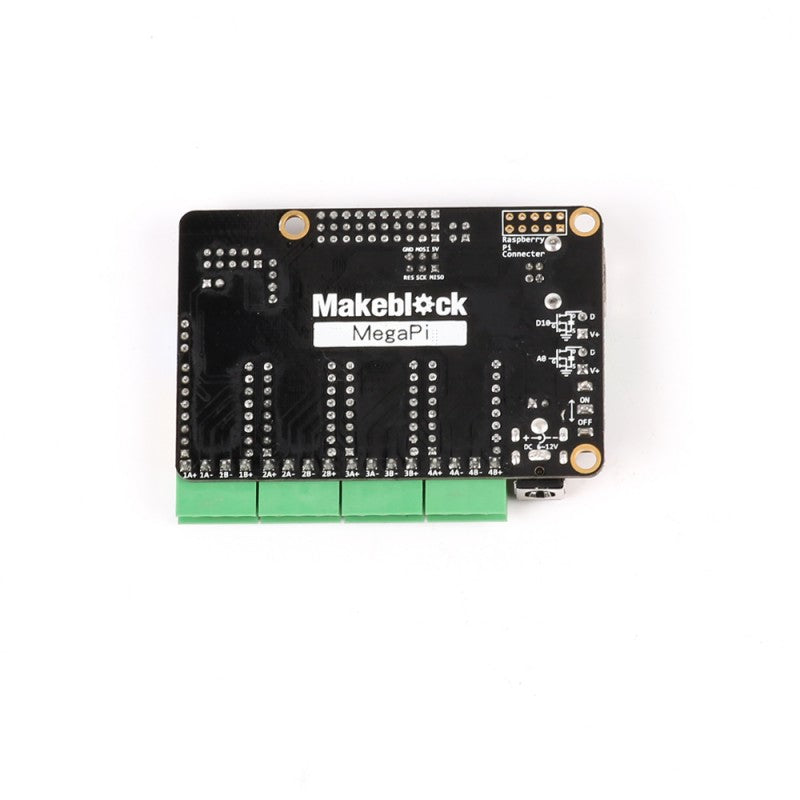
• One Raspberry Pi switch interface (requires manual soldering) to realize 5V to 3.3V serial communication.
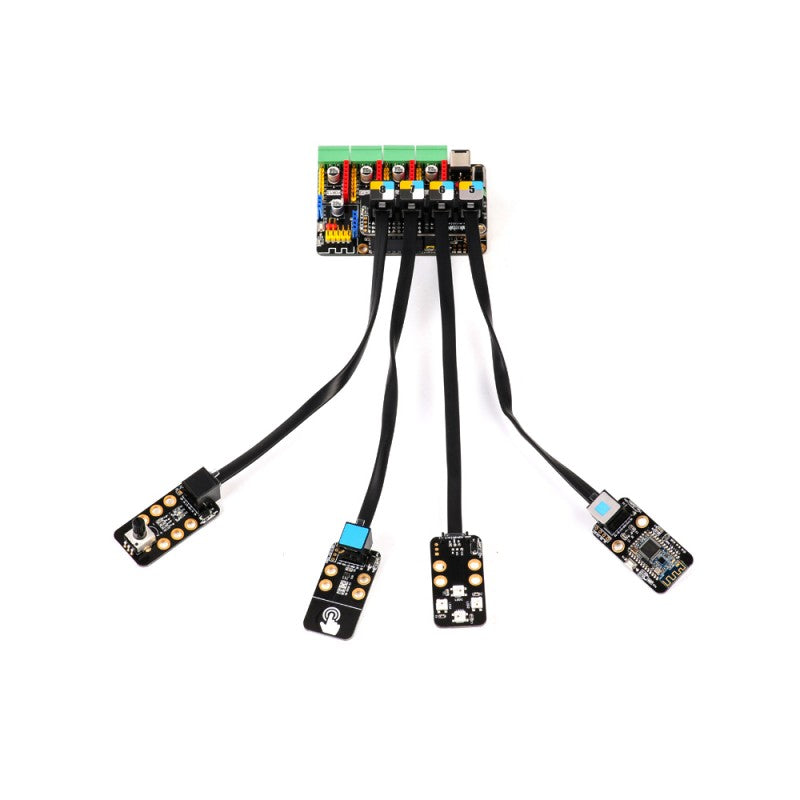
Introducing Interfaces of MegaPi and Other Plug-in Modules
The various colors on MegaPi represents specialized functions:
• Red pin--power output/motor output;
• Yellow pin--I/O pin;
• Blue pin--wireless communication interface
Specifications |
|
|---|---|
| Microcontroller | ATMEGA2560-16AU |
| Input Voltage | DC 6V-12V |
| Operating Voltage | DC 5V |
| I/O Pins | 43 |
| Serial Ports | 3 |
| I2C Interface | 1 |
| SPI Interface | 1 |
| Analog Input Pins | 15 |
| DC Current per I/O Pin | 20mA |
| Flash Memory | 256KB |
| SRAM | 8KB |
| EEPROM | 4KB |
| Clock Speed | 16 MHz |
| Dimension | 85 x 63mm |
| Package Content |
1 x MegaPi 1 x 2.54mm- 2 x 5 16mm Female Header 10 x M2.5 x 6mm Screw 5 x Brass Stud M2.5 ×12+6 4 x Brass Stud M2.5 x 19mm |
DIY CAMERA SLIDER
Have you ever imagined that you can also DIY your own camera slider? Yes, you saw it right! You just need several beams, a stepper motor, a MegaPi to build the main part, then a synchronous belt, and now your camera slider is done. As you see, the camera is fixed on the camera slider to take photos of the scene in front of it. Wow, it is so cool, isn't it?
MINI XY LASER ENGRAVER
How do you usually represent your ideas, through drawing, taking photos or engraving it on your favorite objects? This Mini XY Laser Engraver, a perfect combination of Makeblock metal beams, stepper motors, a MegaPi and an engraving laser head, allows you to engrave everything you want. Compared with XY Plotter (with Laser Engraver Upgrade Pack), Mini XY Laser Engraver is much more portable but of the same capabilities.

DIY ROBOTIC ARM
Besides a desk lamp and notebooks, you can now also put your own Robotic Arm on the desk. Built of metal beams and a gripper, with a MegaPi and two stepper motors to power it, the Robotic Arm can catch many objects. It has several degrees of freedom and can rotate freely at wide angles, so it can easily catch everything you want as your hands. Seeing is believing, come and build it as quickly as you can! (Leap motion controller for gesture control is NOT included in the package.)
Pairs well with
MegaPi - Born to Motion Control
If you have any questions, you are always welcome to contact us. We'll get back to you as soon as possible, within 24 hours on weekdays.
-
Shipping Information
Use this text to answer questions in as much detail as possible for your customers.
-
Customer Support
Use this text to answer questions in as much detail as possible for your customers.
-
FAQ’s
Use this text to answer questions in as much detail as possible for your customers.
-
Contact Us
Use this text to answer questions in as much detail as possible for your customers.